Exploring the natural colours in Iceland

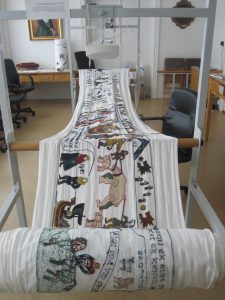
From Guðrún Bjarnadóttir’s workshop to my natural dyes experiment project at The Icelandic Textile Centre.

On June 7th,  some Concordia students, my professor, Kathleen Vaughan and I attended a natural dyes workshop led by Guðrún Bjarnadóttir, an Icelandic natural dryer and author of Plants of Iceland – Traditional uses and folklore. She warmly greeted all of us at her plant dyeing at Árnes við Andakílsárvirkjun in Borgarnes where the workshop took place.

She put us into groups of twos and then conducted the workshop by first giving demonstrations (e.g. how to cut rhubarb). We then boiled plants as Gudrun gave instructions. She mentioned important rules about dyeing plants i.e. respect the plants, do not take too much; never use the dye pots for cooking food; use as little chemicals as possible. Gudrun is a hands-on workshop leader, very attentive and dynamic, moreover, she loves that her workshop participants learn by doing.

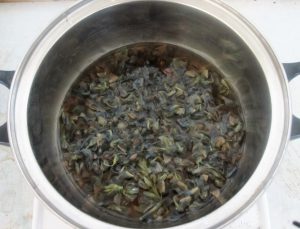
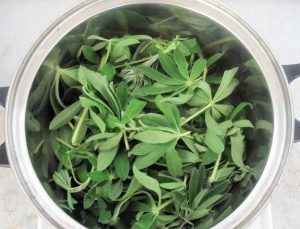
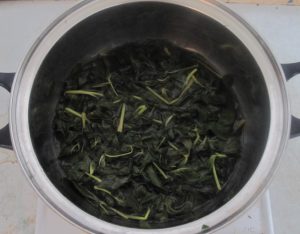
Dominique and I got spruce pine cones, which Gudrun boiled one night before the workshop as it needed more time (4-5 hours) to boil them. The second one that we boiled was rhubarb leaves. It took about an hour or so to boil them. Gudrun mentioned that using rhubarb for dyeing wool is not part of the Icelandic tradition. People imported rhubarb to Iceland as a food plant many centuries ago.

Spruce pine cones. Photo: Avy Loftus, 2018

While waiting for the dyebath to be ready for dyeing, Gudrun offered us home-made food in her house. About one hour later, the dyes were ready and Gudrun took out yarn, which she had already soaked in alum overnight. The yarn was ready to be dyed and she chose white and grey wool (3 of each colour) to be dyed in the dye pots. We put the yarn in pots and waited for a while until the yarn soaked in the dyes.

In the meantime, she told us briefly about the history of plant dyeing in Iceland, icelandic plants she uses and mordants that are used to enhance the colours, such as alum, copper, creme de tartar, ammonium, chrome, iron, tin and vinegar. Copper, chrome and tin should not be used for more than sixty minutes with the yarn, and iron should not be used for more than fifteen minutes. In the old days, cow urine and human urine were used for mordant. Older urine was preferred as its pH level increased and it became more alkaline.

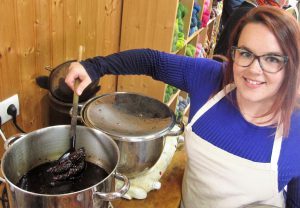
Gudrun, later on, prepared three dye baths for the yarn; alum, copper and ammonium, which all had strong odours. Then, she started putting the yarn into alum, copper and ammonium and asked us to track them all. Our rhubarb leaves gave a deep yellow colour, and with alum, they became bright yellow. The copper and ammonium resulted in a moss green colour.

Rhubarb leaves with alum, became bright yellow. Photo: Avy Loftus, 2018

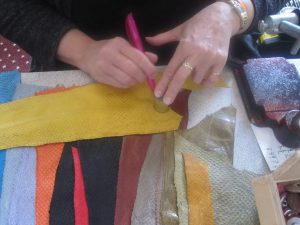
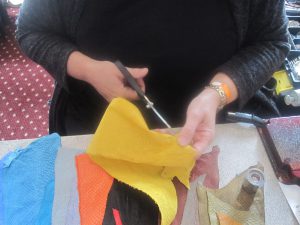
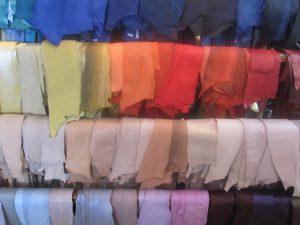
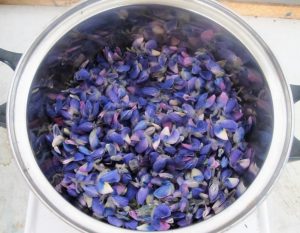
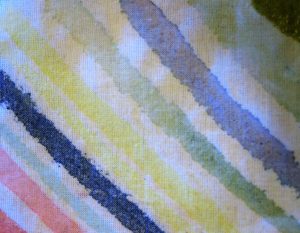
Making dyes requires time, patience and energy, but the natural beauty of the colours as the result of the workshop was gratifying. Each plant provides an amazing diversity of shades which comes from Icelandic moss, lichen, lupin leaves, lupin flowers, heather, spruce pine cones, rhubarb leaves, rhubarb root, madder, birch, onion skin and cow parsley.

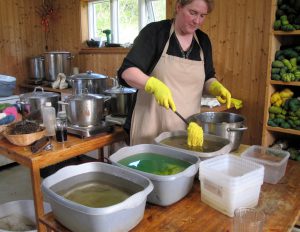
I dyed cotton and silk fabric into the dyebath that was used at the workshop. The results were different from the colours on wool. The colours used on cotton and silk ended up more pastel. Wool and silk have different fibre characteristics; therefore, the result was not the same. It is also impossible to obtain the same colour twice because of reasons such as the pH degree of soil and water, which can vary.

Pastel colours on silk and cotton. Photo: Hannah Grabowecky, 2018

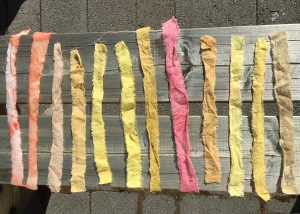
A week after the workshop, I started my natural dyes experiment from lupin flowers and leaves, using rain water and tap water. The variety of colours were produced as the result of my experiment. The dye from lupin flowers is usually greenish, but with alum as the mordant and rain water, it can be greyish. With vinegar as the mordant and rain water, it can be red purpleish. The dye from lupin leaves is usually yellow, but with mordant, it can be a deeper yellow shade.

Lupin flowers. Photo: Avy Loftus, 2018
Lupin flowers after one hour. Photo: Avy Loftus, 2018
Lupin leaves. Photo: Avy Loftus, 2018
Lupin leaves after one hour. Photo: Avy Loftus, 2018

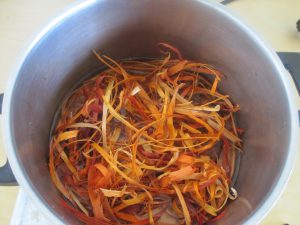
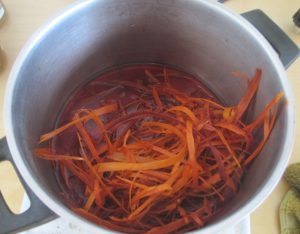
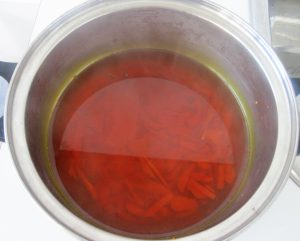
As Gudrun mentioned having difficulties with sappan wood to produce red, I investigated the sappan wood dyeing process with rain water and tap water separately. I found that using rain water to boil sappan wood produced a deeper, clearer red. On the other hand, using tap water produced a more orange colour. With alum as a mordant, it produced a deeper orange. It’s the same case for turmeric. Using rain water to boil the turmeric produced a deeper yellow, without any mordant. Meanwhile, using tap water to boil the turmeric, produces a lighter yellow and with alum as a mordant, it becomes a deeper yellow.

Sappan wood. Photo: Avy Loftus, 2018
Sappan wood with rain water. Photo: Avy Loftus, 2018
Tenderizing turmeric. Photo: Meghan Riley, 2018
Turmeric dye. Photo: Avy Loftus, 2018

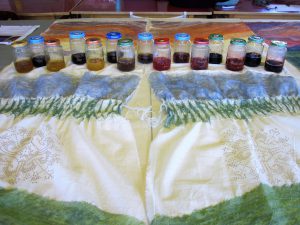
A dyer should aim to create new shades, rather than to duplicate others’ results. I created different shades of colours for my artwork and labeled them as follows: lupin leaves (with alum, rain water), lupin leaves (with alum, tap water), lupin leaves (with vinegar, rain water), lupin flowers (with alum, rain water), lupin flowers (with alum, tap water), lupin flowers (with vinegar, rain water), sappan wood (without mordant, tap water), sappan wood (without mordant, rain water), sappan wood (with alum, tap water), sappan wood (with vinegar, rain water), turmeric (with alum, tap water), turmeric (with alum, rain water), indigo + turmeric (with alum, tap water), indigo + lupin leaves (with alum, rain water), sappan wood (with alum, rain water) + lupin leaves (with alum, rain water), sappan wood (with alum, rain water) + indigo.

Different shades of colours for painting. Photo: Avy Loftus, 2018
Different shades of colours on cotton. Photo: Avy Loftus, 2018
Layers of colours from lupin leaves, turmeric and sappan wood dyes. Photo: Avy Loftus, 2018
Layers of colours from lupin leaves, turmeric dyes and a little bit of indigo. Photo: Avy Loftus, 2018
Icelandic motif, using sappan wood and indigo. Photo: Avy Loftus, 2018
All natural colours produced at the dye studio were applied on these paintings. Photo: Avy Loftus, 2018

Plant dyeing deeply resonates with one’s view towards colours. A dyer or an artist cannot guess the exact shade that will be produced through plant dyes but the uncertainty is a key part of the experience. The variables involved make dyeing exciting, as each project will result in new shades and tones. In the end, plant dyeing is gratifying and the end result makes the whole process worthwhile.

Vatnsdæla á refli

The idea of  Vatnsdæla on a tapestry was born from the vision of Jóhanna E. Pálmadóttir. She was inspired by the Bayeux tapestry, which was created approximately between 1066-1077 and recorded at a Cathedral in Northern France.

In the beginning of this wonderful project, Jóhanna collaborated with the second year students from the graphic design department at the Iceland University of the Arts in Reykjavik, who created the drawings of Vatnsdæla in 2011. They were under the supervision of Kristin Ragna Gunnarsdóttir, a graphic designer, illustrator, writer and teacher at that school. Helga, Jóhanna’s daughter helped with the process of poking  holes on the first drawing in order to transfer the images onto the tapestry. Later on, a group of students from Denmark volunteered to undertake poking holes in the rest of the drawings.

Part of the drawing. Photo: Avy Loftus, 2018
Transferring the drawing into a transparent paper and poking the holes into the tapestry. Photo: Avy Loftus, 2018
Part of the embroidery on the tapestry. Photo: Avy Loftus, 2018

The aim of this project is to revive the Vatnsdæla saga, an old story in Iceland, in a new, exciting way through a textile based community project. Jóhanna, who was on the board of Textilsetur Islands at that time, also collaborated with Landnám Ingimundar gamla, an association that assisted with the historic narrative of Vatnsdæla saga. The saga is the family history of the people of Hof, a farm in Vatnsdalur, not far from Blönduós. It took place from 9th to 11th century and was written in 1270 AD. The story covers themes such as love, fate, honour, perseverance and valiance against enemies. 

Colourful yard used for the embroidery. Photo: Avy Loftus, 2018

Jóhanna purchased the yarn for the tapestry from Ístex hf, a spinning mill that produced the yarn from lambs’ wool. The ancient embroidery, which existed in the middle age in Iceland, is introduced again through Vatnsdæla on a tapestry project. The tapestry will be 46 metres long and the names of all those supported this project will get their names in a book which will be displayed alongside the completed tapestry. People can support this project through purchasing an embroidery lesson on site or through donations.

Vatnsdæla on a tapestry at Kvennaskolinn. Photo: Avy Loftus, 2018

Jóhanna’s vision is to exhibit the finished Vatnsdæla on a tapestry at a location in a farm land, where Þingeyrakirkja, an old stone church, is located and the church was built in 1873. On this farm land, the first monastery in Iceland was built in 1133. 

The location of Vatnsdæla on a tapestry is now in Kvennaskólinn, the former women’s school in Blönduós. The opening hours are from 13:00 to 17:00 on weekdays from June 15th to August 15th. During winter months and weekends, the site is closed, however, group visits can be arranged. 

Kvennaskólinn, the house for Vatnsdæla on a tapestry now. Photo: Avy Loftus, 2018


Gestastofa Sútarans

While attending knitting festival in Blönduós last weekend, I was intrigued by the colourful leather I saw, which I believed to be snake skin. Later on, I spoke to Hjördís Þorfinnsdottir who made some colourful buttons from the leather and I found out the material was actually salmon skin. She showed me how to make a button from salmon skin step by step.

Draw a circle according to the button’s size template. Photo: Avy Loftus, 2018
Cut it and place it in a button holder. Photo: Avy Loftus, 2018
Put the fish skin into the button holder and press it together with the back of the button. Photo: Avy Loftus, 2018
Beautiful yellow button. Photo: Avy Loftus, 2018

After that, we conversed and she informed me about a tannery centre in Sauðárkrókur, about 40 minutes bus ride from Blönduós, where she bought all the salmon skin displayed at the festival. After the festival ended, I decided to go to the only tannery visitor centre in Iceland, Gestastofa Sútarans in Sauðárkrókur with some Concordia students and Deborah, a residency artist/teacher from Scotland.

At the Gestastofa Sutarans, we were greeted by Marianna Margeirsdottir. She gave us a tour where the fish tanning process took place at the back of the visitor centre shop.  It is also a place where staff and workers process the skin of lamb, horse and sometimes seal and other skin, according to the customers’ order.

The tanning process for fish skin takes about a month, because every fish is different – different texture, oil content, etc. The fish skin that the Gestastofa Sutarans use are wolffish, perch, salmon and cod. None of these fish are on the endangered species list.

The fish skins are purchased from commercial fisheries and shipped in boxes. The combination of chemicals are used to remove all the fish oils so that there is no fish odor anymore. Through a month chemical and mechanical process, the skins are churned, soaked, fleshed, vacuum dried and dyed. The special tanning treatment prevents the fish leather from becoming stiff, once all the oil from the skin is taken out. Unfortunately, we could not see the earlier processes of tanning the skin. The following pictures are half of the processes of fish tanning that Marianna had shown us.

The fish skins are stapled onto a shelf to stretch them, in order to achieve the best possible result with an even surface. This has to be done one by one. Photo: Avy Loftus, 2018
The skins dry on a shelf between 1 to 2 weeks. Photo: Avy Loftus, 2018
The backs of the skins must be shaved properly to remove excess fibres. Photo: Avy Loftus, 2018
The skins are softened by spinning them in a tumbler. Photo: Avy Loftus, 2018
According to the customers’ orders some skins are treated with a finish, e.g. glitter paper is imprinted onto salmon skin. Photo: Avy Loftus, 2018
Perch skin. Photo: Avy Loftus, 2018
Salmon skin. Photo: Avy Loftus, 2018
Cod skin. Photo: Avy Loftus, 2018
Wolffish skin. Photo: Avy Loftus, 2018

The fashion world is in constant flux, always changing and innovating. Within the last couple of decades, one of the most exciting trends to have emerged is the use of fish skin as leather. Fish produce a variety of textures from the vast amount of species, which has astounded leather specialists around the world.